Friday, February 17, 2012

Quiche Lorraine with Rosemary Crust

Do you ever think back about how your life was a mere two years ago? The Gabi of two years ago could never imagine that I'd be living in an adorable little lakefront cabin with the love of my life and our sweet little pup, playing and recording music that people actually like, enjoying a successful academic career, and cooking my heart out. Life is pretty wonderful when you stop asking questions, follow your heart, and let the pieces fall.

That being said, it's the small wonders in life that make everything magical, like the sound of the frozen ice crashing on the banks in the morning or the sweet surprise of sugar and homegrown Rosemary in a sweet little quiche crust! I bring you my latest and greatest quiche creation.

But first, I have to admit: Our cabin has the most perfect light and windows. Inside I am growing, Parsley, Rosemary, Thyme, Chives, Dill, Basil, Aloe, Ginger, Garlic, and my sweet little Vanilla Orchid. If you knew how small my kitchen is, you'd be thoroughly impressed with my set-up. I understand that it is hard and sometimes impossible to grow fresh herbs inside, but if you have the right light, you are doing a disservice to your cooking by not having these little gems in your life. In fact, not only do they taste wonderful, but my chives just started blooming the most gorgeous purple flowers: beauty and taste bundled into one small little adventure.

*Quiche Lorraine with Rosemary Crust

For the crust:
1 1/4 cup all-purpose flour (here you can substitute whole wheat if you wish)
2 tbsp chopped fresh rosemary (depending on your taste, you can go for 1 tbsp here, but I prefer the zing of the rosemary. You can also do half Rosemary/half Thyme)
1/2 tsp salt
2 tbsp cold butter, chopped in half
5 tbsp shortening cold, chopped in 5 pieces
4 tbsp ice water

For the filling:
6 slices of bacon (I always use Low Sodium Bacon, but again, it's your preference)
1 onion, sliced
3 eggs
1.5 cups of fat free milk (here I substituted with Lactose free Smart Balance, and I also sometimes use Coconut Milk as well. Additionally, it depends on how heavy you want your quiche, but you could use whole milk. The fat free makes it light and healthier.)
1/4 tsp salt
1.5 cups of Gruyere or Swiss Cheese (I'm in love with Gruyere right now, so I'll find any excuse to use it. If you have never had it, it tastes like a more mild Swiss cheese mixed with parmigiana. The next time I make this, I am going to do 1 cup Gruyere and 1/2 cup Swiss because the Swiss gives it a little extra punch.)
1 tbsp all-purpose flour (again you can substitute whole wheat here)

In a large bowl combine flour, salt, and rosemary. Using your hands (This is the fun part! It is the time to let out all of life's stresses), gradually add the butter and then shortening. The butter and shortening should form into pea size pieces. At this point, your dough will not be smooth. and your hand, while properly moisturized from the shortening, will certainly be messy. Fold in the water and mix until dough has formed. Again, using your hands spread the dough along a 9"properly greased pie plate. Put this in the refrigerator for approximately 40-60 minutes depending on how long it takes the crust to firm.

*During this time, I start my quiche filling to cut down on time.

Partially bake the pie crust:
While the crust is in the fridge, preheat the over to 375 degrees. Once the crust is firm put foil over it, and bake it for 25-30 minutes. When you remove it from the oven, feel free to carefully push down any bubbles. Remove the foil and bake the crust for 5 more minutes or until it's golden brown.

*Turn the oven up to 450 degrees once the quiche crust is finished.

Make the filling:
In a pan, I used a cast iron skillet because it really brings out the flavors, cook bacon until it is crisp. Depending on your stove, this should take about 5 or 6 minutes. Take the bacon out, and place it on a paper towel to drain. Using enough drippings from the bacon to grease the pan, cook the onions until they are soft; this should take about 3 to 4 minutes, and then drain them as well. I understand that this is not the healthiest method of cooking onions, but it is okay to live a little once in a while, but certainly not ALL the time.

In a large boil whisk together the eggs, milk, and salt. Add the onions and bacon to the egg mixture. In another bowl (sorry for all of the dishes, but you can clean them while the quiche is cooking, which I tend to do. Wash and go all the way!) mix together the flour and cheese. Add this to the egg mixture as well, and make sure that everything is evenly mixed.

*I was thinking that next time I make this, I may add some herbs to the egg mixture as well to give it a little extra something.

Pour the egg mixture in the pie crust and bake for 40 minutes. The cooking time for quiche is really up in the air, and it depends on when the eggs congeal. The cooking time of 40 minutes is when everything is at room temperature. If it's cold, then give it a little more time. The rule of thumb here is once you stick your knife through the center of the quiche and it comes out clean, like a cake, it's ready. But check it frequently because you do not want it to overcook.

Sit down with a glass of wine, enjoy life, and indulge in the important things!

Here's some music to whisk to. I first heard this song when I was in the grocery store, and it made my food shopping experience a little bit more jazzy:


Wednesday, November 23, 2011

Yum In My Tum Tom Kha

I've become really fascinated with the ways music and food interweave. For example, the punk culture of the 90's becoming part of the growing vegan culture today. I began to think about music I listen to when I cook, and how it influences my palate. I usually listen to folk music, with a large chunk dedicated to Ingrid Michealson; as you might imagine, I too fall into a category of knee sock-boot wearing earthy chic, who gardens, eats in season, knits (though not cooking relating, but neither is the fact that I wear boots everyday), and blogs, and here I thought I was unique ;)

It's been a whirlwind of a year, and I rarely find time to blog. I, however, generally have time to cook, so I have LOTS of great new recipes. I've recently moved (yes, again!), but now I'm in heaven with my own kitchen and lots of quiet. I moved most of my potted plants from my garden inside our new house; they are thriving here. My african violet is loving life. Before she didn't have any flowers, and now she's filled with both flowers and hunter green foliage.

As the leaves began to yellow on my ginger plant, I decided to harvest the root. What I didn't realize was aside from the tubers, ginger has long tough roots. Silly me, I tried to harvest it in the kitchen. I quickly realized, we didn't have any gardening tools, so I used a spatula. My wonderful partner woke up and walked into the kitchen just in time to spot, me spatula in hand, attempting to dig up ginger roots, but instead plowing a huge clot of dirt from the pot onto my shirt, the floor, and into my mouth. At this point, I decided to move outside. After a little more struggling, this time with a spoon, alas mission accomplished.

I now have a HUGE bowl of ginger root. I'm giving some away to friends and family and replanting the remainder for next year's harvest. In the meantime, I've been on ginger overload. Thus, I bring you the BEST Tom Kha soup I have ever had! For those of you who have never heard of Tom Kha, it is a coconut milk soup with chili paste. It's sweet, and you can make it however spicy you want. This recipe originally came from myrecipe.com, but I have since altered it.

Ingredients

  • 1 can (14 oz.) coconut milk
  • 1 can (14 oz.) reduced-sodium chicken broth (to make this vegan, you can use faux chicken broth)
  • 8-10 quarter-size slices fresh ginger (this really depends on how strong of a ginger taste you want in your soup. The original recipe calls for 6 quarter-size slices, but I put 8; otherwise it's bland).
  • 1 stalk fresh lemongrass, cut in 1-in. pieces (this is optional, especially for those who cannot find it in the grocery store. Additionally, you can use lemongrass paste, which adds the same flavor. I leave this out if I can't find any at the store.)
  • 1 pound shrimp (this is optional too, for a vegan/vegetarian version use tofu)
  • 1 cup sliced shiitake mushrooms
  • 1 tablespoon fresh lime juice (I don't usually measure this. I squeeze an entire lime into my soup.)
  • 1 tablespoon Thai or Vietnamese fish sauce (nuoc mam or nam pla)
  • 1 teaspoon sugar (plus a couple dashes. keep tasting the soup until it's flavorful)
  • 2 teaspoon Thai chili paste (similar to the sugar, just keep adding it slowly to see when the flavor is right for you)
  • 1/4 cup fresh basil leaves
  • 1/4 cup chopped leeks

Preparation

In a medium saucepan, combine coconut milk, broth, ginger, and lemongrass and bring to boil over high heat. Add shrimp, mushrooms, lime juice, fish sauce, sugar, and chili paste. Reduce heat and simmer until chicken is firm and opaque, 5 to 10 minutes. Discard lemongrass. Garnish servings with basil and leeks.


On a side note, while I was cooking dinner last night, I was absolutely famished. I forgot my lunch at home, and was surviving on pretzels the entire day. But I recently discovered Amy's Organic Pita Pockets. These are ABSOLUTELY perfect for someone on the go. Some of them are vegan. I snacked on one while my soup simmered.

Music to simmer to:

Monday, August 15, 2011

American Girl in Spain
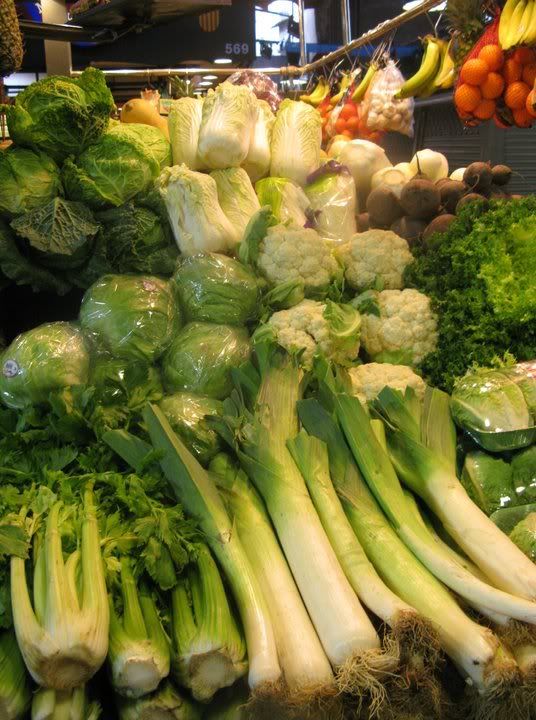
This summer I've spent some time in California, where I thought I wanted my roots planted. But as of recent and in part because of a trip to Barcelona, I don't know that my roots are ready to stay in any specific soil, at least not yet.

As I sit over a plate of eggs from our neighbors farm, with fresh basil and tomatoes from our garden, I feel, breathe, and eat (literally) the pleasure of late August air dripping with a slight hint of fall breeze. I love fall: the brisk air at night that forces lovers closer, colors changing from green to oranges, college football (I had to slip this one in there), and of course the wonderful smell of fall cooking, pumpkin being of course my favorite. But I'm not sure I want to stay in a space where fall turns to winter. I was not made for winter. I need to spend my winters discovering cultures of a warmer climate, but more specifically food culture within the cultures. While I was in Spain, I continued to say, and perhaps this is because after six years of Spanish classes, I still stumble over my own tongue, there are two things that speak a universal language: music and food.

In Barcelona, there are wonderful markets unlike anything I had seen before. It's like a side pocket of traditional culture that lingers off the main road, which is saturated with tourists and hooky popular culture. I felt like I found a little piece of magic where even though I struggled to order mushrooms, the woman in her vegetable stand still spoke the same language as me.
(thanks to Jay Cagney for the picture)

The market has small restaurants that are small stands with bar stools where everyone is talking. It adds to the vibrant culture that engulfs you as you enter. But off the beaten path a little, there was a small restaurant that we ate breakfast at two days in a row. One of my favorite things to eat there was Tortilla Espanol, which is a Spanish potato and onion frittata. With this, I give you a little piece of my Spanish adventure:

1/2 cup olive oil
2 lbs white potatoes (you can also use red here) peeled and sliced thin
1 onion sliced and diced
6 to 8 eggs beaten

Glaze a pan with olive oil, and add potatoes on medium heat. Stir frequently for about 20 minutes or until the potatoes are cooked. Remove the potatoes, and add the onions to cook until they are a bit brown. If needed add oil to the onions as they cook. Add the onions to the potatoes with some salt and pepper. Pour the eggs into the mix.

Wipe the pan out, and add oil to coat the pan. Pour the egg mixture into the pan, and pat down any layer that sticks up (specifically the potatoes). Cover and cook for about 10 minutes or until the eggs are golden. Flip the omelet onto a plate, slide it back into the pan to cook the other side, and allow it to set for a couple of minutes.

You can customize this to your liking, but I really enjoyed the simplicity of this with a wonderful cup of coffee. I would suggest Rosemary or some cheese as possible additions. I'm currently obsessed with Gruyere. I put it in everything.

Music to wake up and cook to. Thanks to my Spanish friends for introducing me to some new tunes:

Tuesday, July 5, 2011

BBQ: The Vegetarian/Vegan Edition

I get a feeling of calm and accomplishment from cooking. I sometimes forget this. For about a month, I ate out and felt stressed regularly. I continued to say that I did not have time to cook with such a busy schedule, but then a friend of mine passed on some wise words. She said, no matter what, cooking gives her a sense of calm. She turns her computer off and takes a break to drink some wine, listen to music, and cook dinner. This is my favorite way to unwind at night. There is nothing more relaxing than throwing on some sweet tunes, opening up a new bottle of wine, and letting the magic begin.

I have a couple of recipes that I have been dieing to share. If you know me, I'm very bad at holding my excitement in. I tend to let it all explode out, but I'm working on it, and I will gradually disseminate the recipes I have recently discovered. To begin, here is my favorite of the bunch. These are vegetarian, but they can be vegan if egg substitute is used. I'm so excited about these burgers that just about everyone I know, knows about these:

Southwestern Black Bean Burgers

2 teaspoons olive oil
1 cup chopped onions
2 teaspoons ground cumin
1 teaspoon ground coriander
1/4 teaspoon salt
dash of ground black pepper
1 cup finely chopped mushrooms
1 cup grated carrots
1 fresh chile, minced, or 1/4 teaspoon cayenne
1/4 cup orange juice
1 cup ground tortilla chips (ground these in a food processor until they are similar to coarse meal)
2 15 oz cans black beans, rinsed and drained
1 large egg, lightly beaten (or egg substitute)

Preheat the oven to 375.

Put onions over medium heat on a warm skillet for about five minutes. Add cumin, coriander, salt, and pepper and cook until the onions are soft. Add mushrooms, carrots, chiles, and orange juice, lower the heat to medium, cover and cook with occasional stirring until veggies are tender. This should take about eight minutes.

While the veggies cook, combine tortilla chips, beans, and egg in a bowl. Mash them together or pulse in a food processor. Drain the veggies and stir them together with the bean mixture. From this mixture form six patties, and place on a lightly oiled baking sheet. Bake in the oven for about 25 minutes, or until the patties are firm and lightly crusted.

Nutritional Facts:
Calories 252
Protein 13g
Carbs 41g
Dietary Fiber 13g
Total Fat 5g
Cholesterol 36mg
Sodium: 847 mg

These are the perfect substitute for a hamburger or turkey burger. In fact, they taste just as good, but leave you without the greasy heavy feeling. You feel a sense of full until later in the day because of the black beans, which is always good to scare away the sweet tooth that seems to suddenly appear right before bed. I had left overs and ate them over fresh salsa the next day.

Music to grill to:


Another thanks to Moosewood Restaurant for this recipe. I have yet to go wrong with this fabulous cookbook.


Thursday, June 30, 2011

Wake Up and Smell the Coffee

Since summer has begun and classes are no longer in session, I spend my work days at home. I've saved a lot of money on random snacks, but have increasingly spent money on coffee. My coffee habit has gone from insane (six shots of espresso/day) to moderate (three cups of coffee/day). But getting out of the house seems priceless. However on a Starbucks budget, that means spending the hard earned dough. There is nothing like a Starbucks to make a coffee addict feel a false sense of inspiration and real sense of cliche: the struggling writer sitting at a coffee shop waiting and yearning for the big break. So, to give myself the same pick me up with a lesser impact on my wallet, I went to Home Goods and picked up Starbucks houseblend for $6.99.

I got home and quickly pulled out my Mr. Coffee machine. I looked intently down at it until I realized, I have no idea how to use this thing. It's true. I've been an avid coffee drinker since graduate school, and I have never brewed a cup of coffee myself. However, I could not let technology dominate me. I mentally fought with it, but soon figured it out. The battle had been won, and my kitchen began to swell with aromas of freshly brewed coffee. After letting it cool, I put it into the fridge. This is important because coffee can become bitter if you ice it right away. I was pleased with my end result, but I'm a coffee snob. I wanted to find new challenges and better flavors. And so, the coffee challenge began.
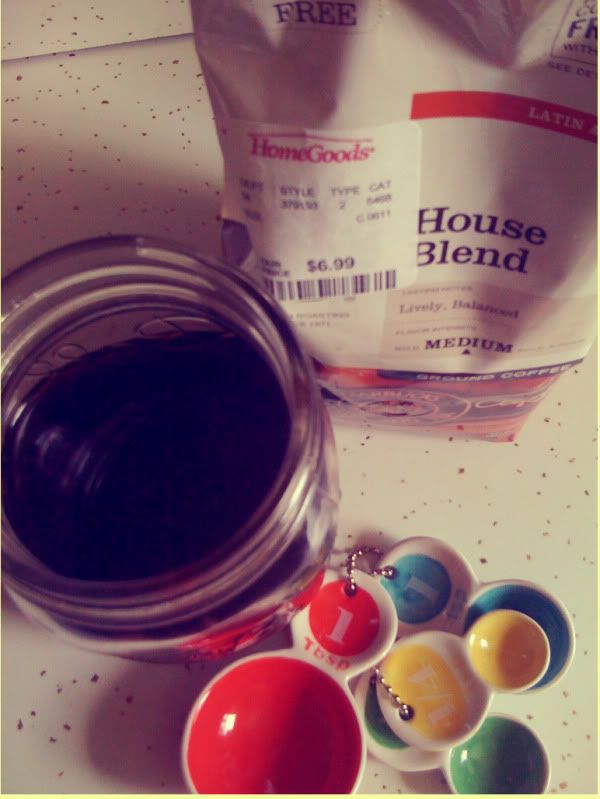

After my days worth of coffee brewing, I found another brew process; I am convinced that the 12 hour wait is worth it. I did a taste test. After taking a sip of this coffee followed by a sip of the traditional iced coffee, the lack of bitterness is evident. It's wonderful. For those of you that read this blog for the mouth watering effect, but lack cooking skills, this is the recipe for you:

1/3 cup ground coffee
1 1/2 cups water.

Pour the grinds into the water, and allow to sit covered at room temperature for 12 hours. Put the mixture through a strainer twice; I used coffee filters. This makes a coffee concentrate. Fill a container with equal parts coffee concentrate and water. This is the fun part because you can really taste test the strength of your coffee. Now go out, grab your iced coffee, and take a walk on the wild side.

Music to brew to:

Wednesday, June 29, 2011

Summer Lovin'
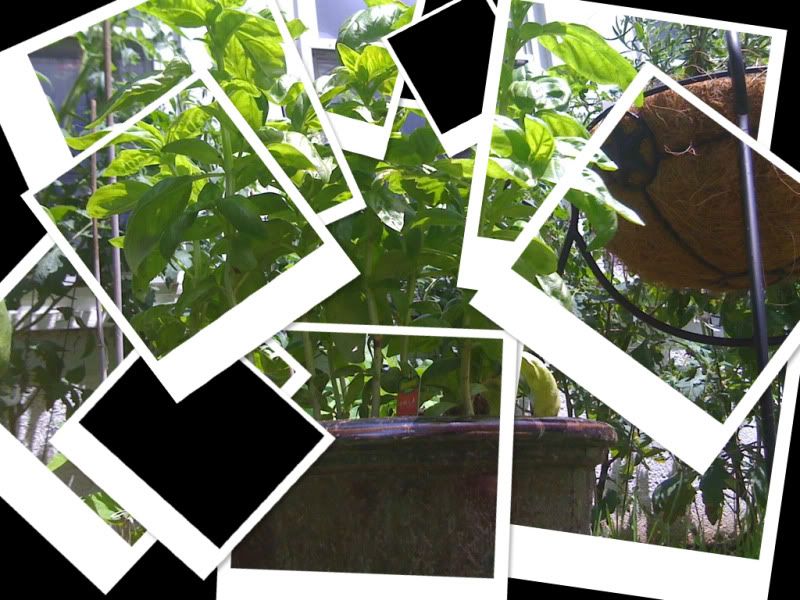
There is something both beautiful and equally frustrating about working for yourself. I can take off whenever I want, sort of. If that were true, I'd never be in my office (otherwise known as the kitchen); but what also comes with that sort of mentality is this guilty feeling of sitting inside while it's beautiful outside. So, for a little bit of time, I sit outside taking care of my garden. The tomato section is looking wonderful; I have two baby tomatoes that I inspect daily. I'm most proud of my small herb garden. It consists of Dill, Parsley, Thyme, Rosemary, Basil (two big pots), Chives, Mint, and Lavender. With these herbs, I've made my a plethora of foods. Each time I make them, I continuously repeat, "This is made with herbs from our garden," with increasing excited intensity each time the words pour from my lips. I'm like a mother watching my children grown.

As I continue to search for recipes, my focus is on eating locally; you cannot get more local than your backdoor. Two days ago, I made the Dill Shrimp Salad that I posted last summer. My dill gave me an extra zing of pride, which, though completely mental, created an extra satisfying flavor to the meal. I thought, "how could I possibly top that." The answer came in two huge pots overflowing with mature basil leaves: PESTO!

Photobucket

Pesto is pretty simple, and there are tons of variations. However, this pesto is both delicious and economical because it substitutes pine nuts with shelled pumpkin seeds. These are cheap and accessible in your local grocery store. Additionally, the fresher the ingredients are the better the pesto will taste. Pesto is great because it exists as a dip, spread, and a pasta topping. It also keeps well in the freezer. Plus how much fresher can you get than right outside the back door! Picking the basil leaves was probably the most exciting part of this pesto. I threw it over some sliced zucchini, mushrooms, and tri color pasta. Thank you to Moosewood Restaurant Cooking for Health for this delicious flavorful combination of basil and tomatoes. It is much different than any basil I've had before, and for that I'm thankful.

Before I give away my secret recipes, I have to note that there is nothing better than good wine and great music to set the cooking juices and inspiration flowing. I've decided to add a music while you cook segment to this blog:


I make sure to crank it loud, sing, and dance while I stir. It's my not-so-secret ingredient for anyone that lives with me or who I've shared a cooking experience with. You can take the instrument from the girl, but the music will forever live in her heart. Shake it like a salt shaker, right?

Pepita (Shelled Pumpkin Seeds) and Tomato Pesto

Yields: 1 3/4 cups
Time: 20 Minutes

1/2 Cup Sun-Dried Tomatoes
1/3 Cup Shelled Pumpkin Seeds (Pepitas)
2 Garlic Cloves, Chopped (I threw in three because my garlic was not super fresh)
1/3 Cup Olive Oil or Extra-Virgin Olive Oil
2 Packed Cups Fresh Basil Leaves
1/2 Cup Chopped Fresh Tomatoes (The freshness of the tomatoes is important because it gives it texture and flavor)
1/4 (or two cranks of my sea salt grinder) teaspoon salt
Generous Dash of Ground Black Pepper

In a small pan bring to a boil the sun-dried tomatoes covered with water (about 5 minutes). Drain and chop.

Throw everything into a food processor. Give it a swirl until everything is smooth or to your desired texture.

One serving = 2 Tablespoons

Calories: 81
Protein: 2G
Carbs: 3G
Dietary Fiber: 1G
Total Fat: 8G
Sodium: 84mg

This book is absolutely fabulous. I got it for Christmas, and have read it cover to cover as my mouth salivates. The tastes, smells, and calories/fat saved are worth the $24.99.

In the meantime, I'm working on my own Vanilla Extract, Vanilla Essential Oil, Mint Oil, Ice Coffee, and Green Tea Concoctions. My new website should be up soon (GGRoseOrganics.com) with options to purchase the lotion from my previous post, face mists, shampoo, but also will be the new home of my blog. In the meantime, eat your pesto hot or cold, but do not anticipate leftovers for long. I write this, as I just polished off last night's dinner, yum.


Wednesday, May 11, 2011

She Is the West Coast

It has been a long while since I have felt truely inspired, until now. I was in California, and it was feeding my soul like nothing I could have ever imagined. I woke up in the morning with no plans, but to simpy wander the streets and see where the wind blew me (literally, it was super windy). I found myself at coffee shops watching all types of people walk by; I liked to imagine their stories and what adventures have brought them into the city.

San Francisco has all of the wonderful things New York City holds with the free spirit of the beach community. I spent three days there, and there was a beautiful rooftop garden that I could see from my hotel. I feel that gardening is a natural progression from the healthy eating journey I began a year ago. I started to realize that as I was cutting lots of produce; I had lots of loose ends that I felt guilty throwing in the garbage. So about six months ago, I started a compost pile. I turned it a couple of times (imagine me, burberry rainboots and all, digging a hole and turning dirt. It IS as ridiculous as it sounds). I forgot about the pile when it was snow covered and cold, but as spring began to sprung, I uncovered it. Right before my eyes, I felt the most satisfying sense of accomplishment.

As Michael Pollan writes, "This heap of rotting vegetable matter looked more lovely to me than the tallest spike of the bluest delphinium. Right then I realized that, like it or not, I was an American gardener, likely to cultivate in the garden more virtue than beauty."

I accepted my fate and planted tomatoes as well as lavender in my small garden. I also started an indoor herb garden. It feels great to know exactly where my food is coming from (thank you to my roommates for watering my endeavor while I was on the West Coast). But it feels even more amazing to see the beautiful plants that I have created. It is an underrated sense of accomplishment.

My journey into California did not end with roof top gardens. I found measuring cups that I have spent a long time looking for:


I also bought matching measuring spoons. This reinvigorated my desire to make creations in the kitchen. After San Francisco, I spent time in Cambria looking at the ocean and exploring the love that fills my life (he knows who he is!). There is a wonderful coffee shop called Cambria Cappuccino. Old habits die hard, and no matter where I am, I find myself at coffee shops searching for the perfect cup of Chai Tea


It was a wonderful local spot; I bought a gorgeous hand crafted mug there. The Chai there was very good. After warming my stomach, I trekked to Yosemite, a four hour journey by car. But of course there was a wonderful detour: WINE COUNTRY! I could tell a lifetime of stories and descriptions about how I found the perfect air that filled my lungs there. However, I will keep it short and sweet, and allow you to experience it yourself one day. I spent time at Lu Cuvier. It was a wonderful spot with impeccable wine. Each wine was partnered with an appetizer, and thus I give you the food portion of this blog:

Savory Cheese & Rosemary Cookies

2 oz. blue cheese, softened

5 Tbsp. butter, softened (I used Smart Balance)

1/8 cup grated Parmesan

1 heaping teaspoon fresh chopped rosemary (I used dry because I didn't have any fresh rosemary on hand. I shutter as I say this).

¾ cup flour (I used Whole Wheat Flour)

Cream together butter, blue cheese, rosemary, and Parmesan. Add flour gradually and stir until combined and dough begins to form into a ball. Turn out onto a lightly floured surface and knead gently a few times. Shape into logs about 1½ inches in diameter (or to desired diameter). Roll each up in waxed paper and put in the freezer. Chill for about an hour.

Heat oven to 325 degrees. Once dough logs are well chilled, unwrap and slice into 1/8- to ¼-inch coins. If dough is still too soft to slice, return to freezer until ready. Bake at 325 for 15 minutes or until lightly golden around edges. Dough can be made and frozen for up to a few weeks. Wrap a second time in plastic wrap to prevent freezer burn. Dough may need to rest outside the freezer for a bit before it is able to be sliced easily.

These are such a quick snack, and they are completely worth every second it takes to bake them (not that it is a long process, as aforementioned). Making these crackers and sharing them allows me to have a part of the West Coast in New Jersey. When I'm driving and I see the mountain ridge, I pretend I'm in California and that the ocean is just on the other side. One day, hopefully sooner than later, I will be there as a permanent fixture on the West Coast landscape. Until then, here's to dreaming...